2015
Click links below for the relevant section
December 2015
-
Bodywork - first fit
Due to work commitments and family time I only managed a couple of days on the car throughout December. With some help available we managed to lift the bodywork onto the chassis to test for positioning of the tub front to back and check to see how much of the boot liner needed cutting down.
First of all, with the tub in position I could see how the routing of the cables would be achieved, however with the need to also fit a heater/fan unit for demisting the screen (an IVA requirement) the route I had originally chosen; through the top of the panelling above the gearbox and into the transmission tunnel, was not going to work. Now I could also see how the firewall/bulkhead was positioned I decided that I would route the cables out through the bulkhead on the nearside, roughly in the middle of the passenger compartment. With this idea in mind I bought a sheet of MDF and made a small shelf that would allow me to fix the cabling, relays and busbar to and tidy it all up. I also bought some re-sealable convoluted tubing to wrap the exposed cables in to make it all neater and also protect the cables from chafing. With that position now known I could also push all the cables through the rubber grommets and then re-attach the plugs used on the engine connections and wrap these too in the convoluted tubing.
Back to top
November 2015
-
Finally...the bodywork
Well finally, 21 months after placing my order for the bodywork it is ready. After a mix up with the original body style I wanted and the mould being damaged and the people who originally manufactured the body, Steve at Fury now has a new supplier and he is once again able to supply the Spyder body and the standard or Le Mans bonnet. I also have the sidepods and boot liner needed to attach the rear of the body tub to the car.
As soon as I had a couple of days off work I organised a hire van to go down and collect the body. I had asked for the body to be done in the Jaguar French Racing Blue colour scheme and they have done a pretty good job of matching this in the Gelcoat, although not an exact match it is fairly close. Although it may not look it comparing the pictures the colour does change quite a bit in the various different lights.
Roll Hoop
Also while I was there I collected the roll hoop that I had previously sent back to have the seat belt mountings moved and adjusted so that they actually worked with the seats. Previously they were spaced too far away from the seat belt holes in the seats to be usable and also too low. Now they have been spaced closer together, in line with the wholes in the seats and angled back slightly to clear the diagonal in the hoop and also angle the belts up to the holes.
Mini Garage
Despite finally getting the bodywork and being able to progress, it will be a while before I actually get round to fitting the body. Having the body will allow me to see where it sits on the chassis and work out where I need to route the cabling and also positioning of the dash. Once I have these worked out the body will need to be stored out of the way again to prevent it getting damaged while these jobs are being progressed.
What i decided to do was make a mini garage for the chassis that would house the complete car once finished but allow me to store stuff in the garage on top of it out of the way and not waste the space above. A 3 metre by 1.8 metre 'shelf' that is 1.3 metres off the floor has given me enough room to be able to move the chassis around in the garage and store it away while lifting the body off the floor and stored safely out of harms way. the last thing I want after waiting all this time is to damage the bodywork.
Back to top
July - September 2015
-
The past few months have been a bit frustrating, with the good weather I really wanted to get into the garage and get on with the build but I've just been finding little bits to do here and there while I wait for the bodywork. Throw in a family holiday and extra shifts at work and the time just seems to get away from me.
Propcatcher
After the initial cutout of the propcatcher and the welding on of the main mounts I trial fitted it to the chassis with the prop in place and decided that I would open the hole out to give a bit of clearance to the prop possibly moving up and down. I have now added the shells to the hole which should help to catch the prop should it let go and also weld on some angle brackets to hold it all together.
Roll Hoop, Seats and Belts
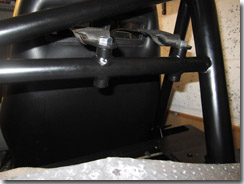
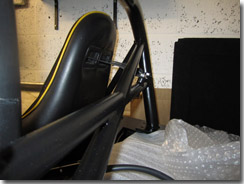
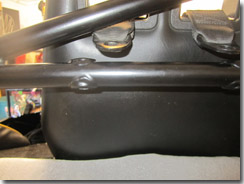
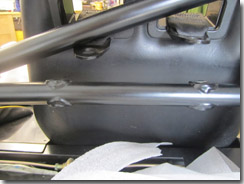
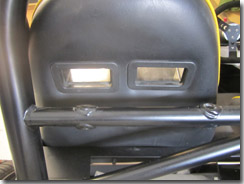
After fitting the seats in place and trial fitting the seat belts it was obvious that the fixing points on the roll hoop were in completely the wrong place. I did some research and found out that this is not uncommon and others have come up with various brackets and fixings to hold the belts but I wasn't really happy with having to bolt something to the roll hoop frame to get the belts fixed. having looked at the fittings and worked out how this could be rectified I did a few drawings and contacted Steve at Fury. He had a look at the drawings and told me to send the role hoop back to him and he would get the mountings sorted to my drawing and have it ready for when the bodywork was complete.
The original mounting points were either too far offset for the openings in my seats, too low down and also one of them too close to the diagonal braces so I couldn't fit a bolt into the hole without cutting it down, not ideal for a belt fixing. The new design has the fixings tilted back from the horizontal so the angle of the belts go up to the openings in the seat and also tilting them back allows for the bolt fixings to clear the diagonal bracing. UPDATE: Steve is now going to supply all his roll hoops with this design from now on.
Flat Bottom Panels
As I said I haven't really been able to do too much lately while I wait for the bodywork. One job I did decide to do was to flat bottom the car so I made some filling panels to go between the two floor sections and cover the drive shaft area, hopefully this will help to keep out some of the dirt from migrating into the drive shaft and differential area. They are just fitted using a couple of right angled brackets and some rivnuts so the panels can easily be removed for access to the handbrake cable adjuster and drive shaft.
Bodywork Update #5
Ok, so the latest on the bodywork as of the end of September 2015 is... it was ready but when they trimmed it down they trimmed it too far in some areas of the sidepods so they are currently redoing those, hopefully this should be done in the next few weeks.
Back to top
June 2015
-
Steering Boss
So the plan is to use the standard Sierra steering wheel to get the Fury through the IVA test as this has compliant edges and frontal impact protection and will also give a larger area for the exemption behind the wheel so the components do not have to meet the sphere test (See the IVA manual page 108 for details). Anyway, once the test is complete I would like to fit a smaller steering wheel but still retain the steering locking mechanism incorporated into the Sierra column. A while ago I found someone selling an original Ford motorsport steering boss that could be used with Ford steering wheels but I had an idea that I could turn down a piece of aluminium and make a fitting that could be used to fit various types of wheel having the different PCD's incorporated. The Original Ford boss uses a 75mm PCD, many of the Momo and similar wheels use a 70mm PCD and I have a flat bottom suede steering wheel I won at a karting event many years ago that had never been used which has a three hole triangular fixing.
Having purchased a piece of 105mm aluminium bar, I turned this down using a lathe at work to the outer diameter of the steering boss and then drilled the 75mm pcd to allow fitment to the boss and recessed the holes so the bolts would sink flush. I also bored out the centre a little to allow for space on the inner side for the fixing bolt of the boss. At some point I will also drill a hole through the centre to allow for the horn wiring to come through once I decide which wheel I am going to use. For now I trial fitted the suede wheel and overall I'm very pleased with it.
Wheels and Tyres
With the prospect of the bodywork arriving in the next few months I decided it was time to get the tyres fitted to the wheels and fitted. Having researched the various tyres available for 13" rims and those that give the best grip but are still fairly affordable I settled on the Yokohama A539's which have a pretty good grip rating and good also in damp conditions but a bit more durable than the Toyo 888's which a lot of people doing track days seem to use but they are so soft they do not last. They certainly feel fairly sticky even when not warm but I guess we will just have to wait and see when we try them out. I think the wheels look great on the Fury I just now need to try and find some centre hub caps which at the moment is proving to be a little difficult.
Back to top
May 2015
-
Bodywork Latest #4
At last some really good news about the bodywork, Steve has managed to secure the services of a company to make the Fury bodywork, to a standard that he is happy with and for the right price to. This company currently make bodywork and panels for some of the British Touring Car teams so hopefully the quality of their work will be to a really high standard. Steve has agreed all the details with them now and has just to sort out getting the mould from the original fibreglass company to this new company but at least its good news.
Plumbing
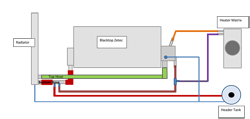
Since installing the engine and radiator I have been pondering how to plumb it all in. With the specifics worked out except for which heater matrix to use, I started to buy the parts needed, 32mm silicone hoses, joiners, pipes, jubilee clip etc.
After fitting the top 32mm silicone hose to the top of the radiator and round to the thermostat housing I found that the hose was too close to the top of the nearside rocker arm. I could have braced this up and clamped it in place but decided against this and bought two 45 degree bend hoses which has now routed the hose nicely away from the rocker arm. I will still probably brace this to support it but it looks much better.
After doing some research for the header tank I found the Renault Clio header has the correct fittings, is a nice compact size and has some good mounting points to allow it to be fitted to the bulkhead.
Air Filter
Trying to find some flexible hose to fit to the front of the throttlebody and MAF housing has proved impossible so I have managed to fit the MAF housing into the front of the throttle body and needed then to find an air filter that fitted onto the outer diameter of the front of the MAF housing. Again this proved difficult but I managed to get a universal one that is about the right diameter although I am not sure whether it will be fully secure but also as this then places it right behind the radiator it will be taking in hot air, far from ideal. Once I have the bodywork fitted I may well re-visit the placement of the air filter.
Busbar
When I originally fitted the loom to the chassis and wired things up I had several switched live and permanent live cables which needed to be joined. Initially I just looped these together with a chocolate block but this looked untidy and I was never happy with it. Having looked around there were a few busbars that would do the job but I decided to make my own which would more than cope with the current expected and all housed in a neat solution. Having bought a project box and a length of copper bar all for the total cost of £8.00 I cut the bar down into two sections, fitted it into the project box and separated each using a piece of insulation board I had lying around with several bolts fitted to attach the cables to. Overall I'm very pleased with this solution and it makes the cables into a secure and neat package. All I need to do now is make some access holes in the sides to feed the cables into.
Front hubs
With the possibility that the bodywork may be ready sometime soon I thought about getting the tyres fitted to the wheels. These wheels which I have are not quite the correct offset for the front of the Fury so I had purchased a couple of 7mm spacers to push them out to the correct offset, however this now meant that the studs for the wheels are too short so some longer wheel studs are needed. To fit the new longer studs I had to remove the hubs again, push the studs out using a hydraulic press and also to fit the new ones and then refit the hubs. The studs are now long enough for the wheels to fit securely.
Back to top
April 2015
-
Seats and Runners
Whilst the build has been ongoing I am always keeping an eye out for parts either on the Locostbuilders website or on E-bay and had been trying to get a set of second hand Cobra Roadster 7 seats, these are the best set that fit the narrow base of the Fury chassis and I knew a new set would set me back about £900. While viewing a set of Intertrim Odyssey seats on E-bay; these are slightly narrower and don't have as much padding as the Roadster 7's, I noticed a link to another set of seats and these were Roadster 7's. Following these closely on E-bay I managed to put a bid in at just the right time to secure them (I also watched the Intertrim Odysseys the next day and they went for £50 more). Once I had picked these up I measured the base fixings and ordered a pair of low runners.
The next job was to trial fit the seats and come up with a way of fixing them securely and at the right angle to be comfortable. With a couple of blocks of wood under the front and back I worked out what was a good angle to give a bit of support under the thigh with the front angled up slightly and then set about making some fixings using some fabricated brackets and a length of nylon bar cut to the correct angle. Fitting this way allows for a slight raising of the seat as its pulled forward.
Bodywork Update #3
Throughout all of this I have been in constant contact with Steve at Fury Sportscars trying to sort out the ongoing issues with the bodywork. The good news is that Steve has been in contact with a couple of companies near him to try and sort out someone who can make the bodys for the Fury kit and has narrowed it down to two companies. Fingers crossed that things can be sorted out and we may make some real progress.
Back to top
January - March 2015
-
Propshaft
With the propshaft now purchased and trial fitted I could now get on with making a prop catcher should the worst happen and one of the couplings lets go. First I made a template of the area out of cardboard so I could see which parts I needed to cut out for the propshaft, handbrake cable, wiring loom and fuel / brake lines. This I then transferred to a piece of 4mm sheet of galvanised steel plate that was in the scrap bin at work, roughly cut out the shape using a plasma cutter and then cleaned it up to fit the chassis rails and clear pipework.
During the trial fitting I noticed there was about 15mm of clearance top and bottom of the hole cutout for the propshaft which should have been enough as there is very little movement up and down of the propshaft with the Cortina gearbox mount but just to be certain I removed another 20mm top and bottom of the arch to be on the safe side so rather than a 83mm hole it is now an oval shape.
For attaching it to the chassis I cut off some 25mm angle bar and these have been welded onto the top and bottom of the plate so it attaches to the top and bottom chassis braces. To allow it to go over the propshaft couplings, the plate has been cut in half and has two brackets welded to it so the two pieces are still attached once fitted. Now the only job to do is find some steel plate and arch it so that it can be welded into place around the prop cutout.
Radiator Fan wiring
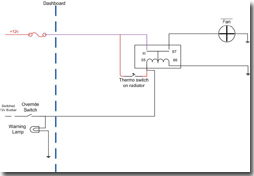
Having looked at wiring up the radiator fan I decided to also fit a fan override switch so I could run the fan without waiting for the thermostat switch to kick it in. Having looked into various options I finally decided that locating a small project box near to the radiator with a relay in would tie in best with the wiring loom. Near the override switch I will also fit an LED indicator to show when the fan is running which will indicate not only when I have the override selected but also if the coolant is getting too hot and the fan has kicked in, reassuring if stuck in traffic.
Looking at the plug supplied on the fan it was of the double spade connector type which is ok but not great at being sealed from the elements and seeing as this will be located at the front of the car I thought I would fit a ‘Superseal’ waterproof connector. These are the type that you find fitted to modern production cars and should ensure a good water tight connection, so I snipped off the spade type connector and fitted the female side of the ‘Superseal’ connector to the radiator fan.
Having also purchased the Ford ST170 thermostat for the radiator I looked around for the original connector to clip onto it but could not find one anywhere, even at my local scrapyard, yet again Big_wasa my Zetec guru came to the rescue as he had a spare one lying around in his garage.
Other Jobs
While still waiting for the bodywork (more on that later) I was looking around at other jobs that could be done. When I fitted the level sender to the fuel tank I didn't want to Loctite the bolts as this can drop into the fuel tank and contaminate the fuel or even block the filter so to prevent the bolts from coming undone, I drilled a small hole through the head of each bolt and wire-locked them together.
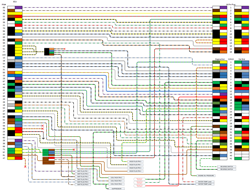
Another job I did was producing a wiring diagram for the ECU to engine connectors. Although I have had the engine running once the bodywork is in place I would like to shorten elements of the loom to reduce the amount of wire and having this diagram should make life easier when it comes round to shortening them and re-connecting. Download the PDF version of this wiring diagram. As stated before this is the wiring for my specific loom and wiring colours have been know to vary from year to year so you will need to check this against your loom, I will not be held responsible for any damaged caused.
Back to top
To 2014


_sml.jpg)
_sml.jpg)
_sml.jpg)
_sml.jpg)
_sml.jpg)
_sml.jpg)
.jpg)
.jpg)
.jpg)
sml.jpg)
sml.jpg)
sml.jpg)
sml.jpg)
sml.jpg)
sml.jpg)
_sml.jpg)
.jpg)
.jpg)
.jpg)
.jpg)
.jpg)
.jpg)
.jpg)
.jpg)
.jpg)
_sml.jpg)
_sml.jpg)
_sml.jpg)
_sml.jpg)
_sml.jpg)
_sml.jpg)
_sml.jpg)
_sml.jpg)
_sml.jpg)
_sml.jpg)
_sml.jpg)
_sml.jpg)
_sml.jpg)
_sml.jpg)
_sml.jpg)
.jpg)
.jpg)
.jpg)
.jpg)
.jpg)
.jpg)
.jpg)
.jpg)
.jpg)
.jpg)
.jpg)
.jpg)
.jpg)
.jpg)
.jpg)
.jpg)
.jpg)
.jpg)
.jpg)
.jpg)
.jpg)
.jpg)
.jpg)
.jpg)
.jpg)
.jpg)
.jpg)
.jpg)
.jpg)
.jpg)
.jpg)
.jpg)
.jpg)
.jpg)
_sml.jpg)
.jpg)
.jpg)
.jpg)
.jpg)
.jpg)
.jpg)
