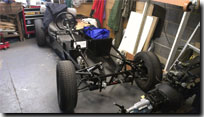
Chassis
After placing my chassis order with Steve Hughes at Fury Sports Cars back in April 12, it was finally ready for collection in July along with the modified items from the Sierra donor and the extra items I ordered to go with the build.
Collecting the chassis
Finally the day arrived to collect the chassis from Fury Sportscars in Kent and I'm not sure who was more excited, me or the boys? Probably me but the boys were excited to go out in the van I had hired for the journey. The three hour drive to Kent went well and we were there ready to collect the chassis and other parts just in time for lunch. While there Steve showed us a model that may become the new updated version of the Fury or an addition to the range, possibly a mid engined version but I won't say any more, other than it looked great and would be good to see this version launched (sorry I wasn't allowed to take a picture).
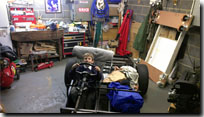
For the journey back we stopped off at Car Builder Solutions to collect some parts that I had ordered and would be used during the build. Another uneventfully but hot return journey and the chassis was ready to be unloaded onto the dolly I had made to allow for easier manoeuvrability around the garage.
Step 1
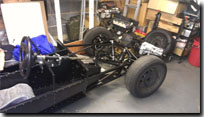
Before starting anything else, I unwrapped the chassis and suspension parts and trial fitted all these to make sure I had everything and all the correct parts. I also trial fitted the differential and took some measurements of the gap between the chassis and the diff mounting points. Now you can space this gap out with washers but I preferred to put some proper aluminium spacers in and using a contact from the Locost Builders site who offered to turn some spacers for me, I sent the dimensions off and received back some lightweight aluminium spacers that fit perfectly, then I ran into my first problem.
On fitting the diff with some spacer to locate it properly I fitted the drive shafts in place through the rear upright faceplates and noticed that the drive shafts were protruding out at different amounts. Now the diff does sit slightly offset in the chassis so I swapped the shafts around as I thought I must have put them in the wrong location but that was even worse so I contacted Steve at Fury to let him know. To ensure I was sent new ones with the correct dimensions I measured from the edge of the diff lip out to the upright face and sent these dimensions off to Steve who promised to make some new driveshafts. Having had contact with a few other Fury builders it sounds like this is not an uncommon occurence..shame really, I hope this isn't a sign of things to come.
Panelling
Being an Aircraft Engineer the prospect of panelling the chassis didn't daunt me at all, in fact I was really looking forward to it as it something that starts to bring the chassis together in fairly simple steps. Having laid out all of the panels and worked out where each should go I labeled them up ready to make a start at locating them in the correct place on the chassis. Before doing any drilling, I marked out the chassis rail on the panel and equally spaced out the position for each hole and centre punched this ready for drilling. Now this may seem a bit laborious but its the best way to get the holes correctly located and a good finished look.
Using a couple of clamps to position the panel firmly, I drilled the first hole with a 3.2mm drill and then fitted a 'skinpin' to keep the location aligned, you can then move on drilling in the extremities and again locate with a 'skinpin'. The 'Skinpins' are worth getting as they keep the panel in the correct place while drilling and also while you are riveting and only cost a few pence each. Having a compressor, windy drill and pneumatic riveter will make the whole process easier too as there is no need to keep recharging the battery on a cordless drill and the windy drills are much easier to retain control of when drilling aluminium. The pneumatic riveter saves alot of effort on the hands compared with a hand riveter and also gives you a consistent 'pull' each time ensuring a strong fastening. Once the panel has been drilled, the skinpins can be removed and the holes made in the panel and chassis de-burred.
I managed to get all the panels drilled and de-burred just before we were due to go away on a family holiday so just before we left I dropped all the panels off at a local Powdercoating firm who etch primed and powdercoated all the panels for me for a very reasonable cost. Doing this will help to protect the panels from corrosion between the steel of the chassis and the aluminium and also give the chassis a good look when finish, although most of it will be covered.
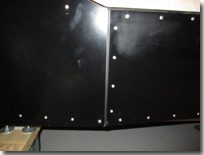
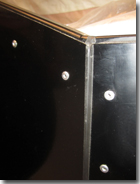
Alpha Powdercoatings in Peterborough had done a great job of the panels giving them a good looking finish and matching the satin look of the chassis, next up was to start riveting them in place. As it was fine day outside a wheeled the chassis outside to make the most of the weather, covering around the edges where the panels were to be fixed with masking tape to prevent any of the silicon sealant I was applying to the panels from squeezing out over the chassis rails and making a mess. Running a fine bead of silicone along each of the lengths that attach to the chassis, I offered the panel up and located it with the 'Skinpins' to hold it in place. Then using the pneumatic riveter it was a quick job to just a pull the rivets and make the panel secure, much quicker and easier than a hand riveter. I used 4mm standard rivets for the side panels and 4.8mm flange rivets for the floor tray as this would need to be able to spread the loads expected in it.
.jpg)
-sml.jpg)
.jpg)
.jpg)
.jpg)
.jpg)
To seal between the gap on the outside of the front and rear side panel, I put two strips of masking tape running parallel to the gap just slightly either side and ran a bead of silicone sealant down it. Then with a finger dipped in soapy water run it along the bead pushing it into the gap. Leave this for 20 minutes to go off slightly and then peal the masking tape away to leave a nice neat bead of sealing between the panels.


.jpg)
.jpg)
.jpg)
.jpg)
.jpg)
.jpg)
.jpg)
-sml.jpg)
-sml.jpg)
.jpg)
.jpg)
.jpg)
.jpg)
.jpg)
.jpg)
-sml.jpg)
.jpg)
